


Microsoft Lists is great way to create a list that you can use as a team. It comes with numerous templates that you and your team can use to help organize thoughts, ideas, posts, and more.
There is so much that you can do with Microsoft Lists, but let’s just start with the basics: creating your first list.
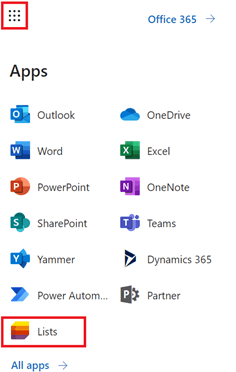
Open Microsoft Lists App
The first step to creating your first List is opening the app. It can be opened in a few different places, so let's show you how to access it from Microsoft 365. Simply open your Microsoft 365 , log in, and click the waffle menu. You will then see Lists at the bottom.
Note: Microsoft Lists may not be available for all tenants at the date of this publication.
Creating Your First List
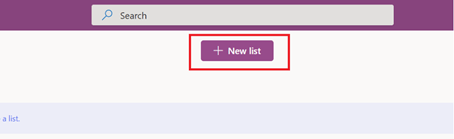
Creating your first list is quite quick, and easy to do. Let's start by creating a list that we will call Tasks. This will help us keep track of the upcoming project due dates. To start, click on the New list button at the top of your page.
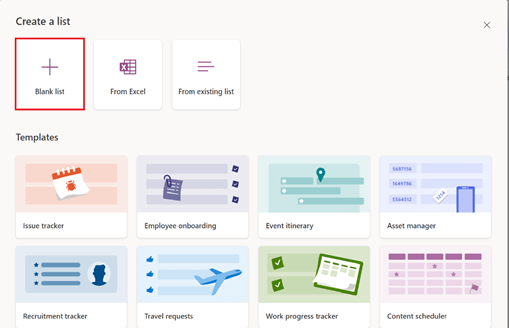
From there, you are going to get a choice of creating a blank list, importing a list from Excel, or using an existing list. You also have numerous Templates that you can choose from. These templates are already set up with quite a bit of content, including linking teammates, status buttons, and many other things.
Today, we are just going to start with a brand-new list. Let’s click on Blank list.
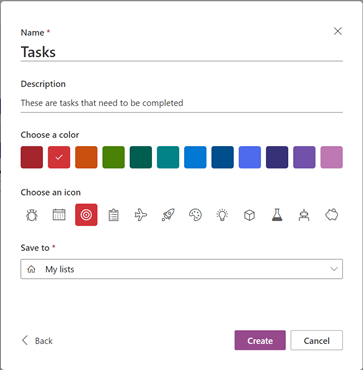
Once you have selected your blank list, you will then get to name it, provide a description, pick a color, icon, and choose where you would like to save it.
We are going to call our list 'Tasks', and as a description, we will simply put 'Tasks to be completed.' You can then pick your favourite color and your favourite icon, and we are going to share this to our 'My lists' section.
You can save these lists to any SharePoint Online sites that you have Edit or greater permissions on.
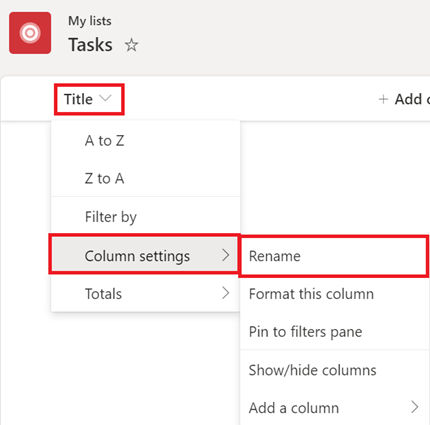
Now that we have created our first list, let’s get it set up so that we can track all of our tasks. Let's start in the first column and rename it. We start by clicking the dropdown, go into the Column settings, then select Rename. You will receive a pop-up, and then simply rename it to 'Task'.
Now, let's begin to build on this, and add some columns that we are going to need. The next column that we are going to add is a people column. This will allow us to attach who we are working with.
All you need to do is click on the Add column tab and select Person from the dropdown menu. You will get a side pane, in which you can set a name, add the description, change the type, and set additional options. If the column Type is set as 'Person', you can allow the selection of groups if you are working directly with a pre-existing group.

Once you are done, click Save at the bottom, and you are good to go.
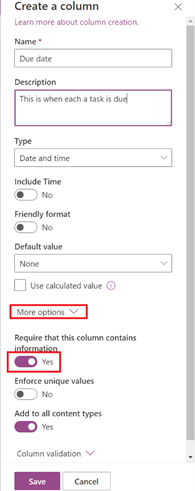
We are just going to add one more column, and this is going to be for the due date. Add a column (like above) and pick Date and Time. Again, you will name and describe it. You now have the choice of Including Time, and Friendly format, which changes your fields to display the date as '2 days ago', 'tomorrow', 'today', etc. However, we are not going to include time or friendly formatting in this example.
We are doing a listing of our tasks, so we want to make sure that we are adding a due date to everything. In the More options dropdown, you will see an option that requires the column to have information to be accepted. Let’s turn that option on.
Adding Information to Your List
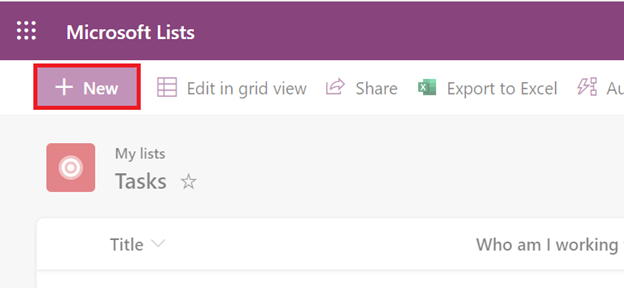
Now that we have set up everything, let’s start populating it with information. To add a task, click on New in the top left.
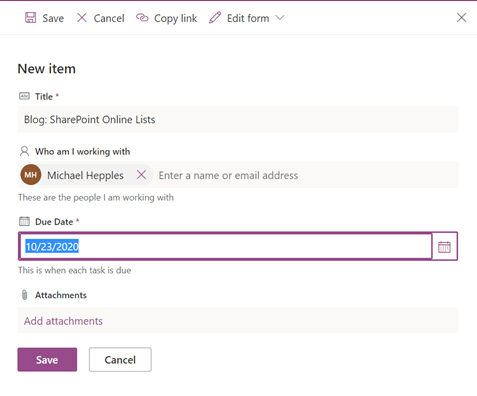
You will get a new item pane come up again, and now we just need to fill it in with all our information. At the bottom, you can Attach documents that are related to the task, to help keep everything organized.
Now that we have created our first task, let's see what we can do with it. Click on the ... beside the list item, and we can find out what we can do with this information.
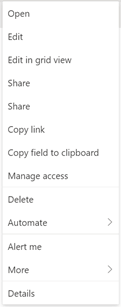
The main ones that you will probably be using are:
- Open: Opens the item details, and allows you to add attachments.
- Edit: Edit the information.
- Share: If you want to share it to someone.
- Manage Access: You can manage who has access to this information.
- Delete: Delete the information.
- Alert Me: This allows you to be alerted when there is a change. You have a few options within there, as to what's changed, how often it gets sent to you, and where it should be sent.
Congratulations! We have made our first list together. Now go ahead and populate it with all of your tasks and projects that you might have coming up. Make sure to share the information with the people that you are working with!