


Last week we had an introduction into the Approvals app in Teams. Where we went over how to create a document approval for a very specific business need, which was simply to get the 'okay' on a document. Did you know this Approvals functionality is an extension of the Approvals functionality in Power Automate that has been around forever? What else can we use Approvals for? Let's look at a few examples of out of the box usage for the Approvals action in Power Automate (and Teams), and how we can use it for more than just approving documents.
Approving Leave Requests
There are many different ways to setup a leave request system, from online applications to leveraging multiple parts of Microsoft 365 and using an in-house-built Power App (like we do at Bloom Software. If you have none of these solutions at your disposal, we can use the Approvals app to create leave requests.
This method will allow us to achieve the following:
- Get our request for time off approved,
- Store the request in a central location for reference, and;
- Attach any requested supporting documentation.
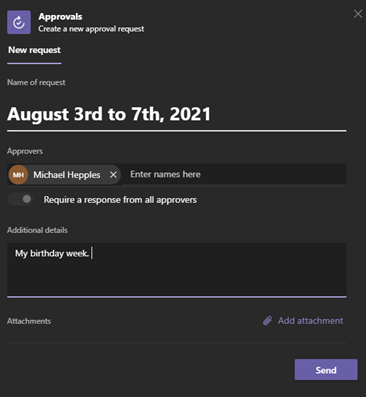
All you will need to do to create an approval for a day off is decide if you want that approval in a Teams channel, or if you want it to be done privately. After that, you will simply create an approval request with what days you want off, who will need to approve the time off, and choose if you want to add details or attach any supporting documents to the request.
Once this is done, it will show up in both your and the approver's Approvals app in Teams (they will receive an email notification as well) and you will be able to track how many days you have taken off, how often you are taking leave, and even keep relevant documentation, such as doctor’s notes. All this information housed in one location in Teams (or Power Automate), can be filtered down if you ever need to review the requests in the future.
Manage Tasks Using Approvals
We can also use Approvals to manage and assign tasks. Imagine this situation, you have an additional internal project that you would like to develop, but you are unsure of your team’s bandwidth at the time. Instead of having to go ask each team member what their availability is, we can just use the custom responses from Approvals.
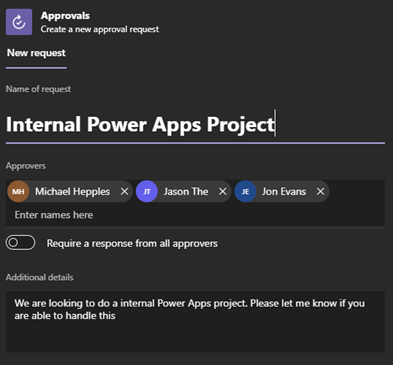
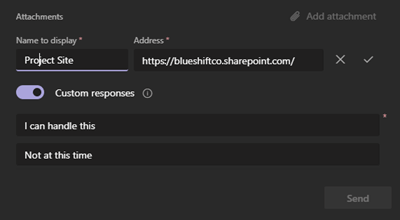
We can put the approval in a Teams channel, with the title of the project, and attach any documentation that will go with it, or even attach the SharePoint site where we will house the project. The next step is to put all our team members in the "Approver" field.
Now, instead of just going with the standard 'accepted' or 'rejected' answers, we'll use "Custom responses" to say, “I can handle this” or “I'm unable to at this time”.
We can then take the team member that approves it first and assign them the project. This way, we will have a record of every time a project has been assigned, and who it was assigned to.
Automate Your Approvals Using Power Apps
My favorite thing about Approvals: It is all built on the Power Platform. To show how Approvals work in Power Automate, we are going to create a flow that will automatically create an approval for you when you place a document in a specific folder in your SharePoint site.
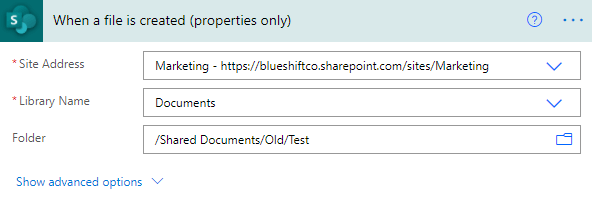
Start by selecting "Automated Cloud Flow" in your Power Automate design studio and picking “When a file is created (properties only)”. Remember to name it something that will allow you to easily identify it.

You will need to now point it to which site, library, and specific folder you want to put your files in to create your automatic approvals. Once you have created that file, simply point to it using your flow.
I have created a file in our marketing site, which has a document library simply named "Documents". Note that you will need to point it to the specific folder as well, or it will create approvals for every document in your document library, and let me tell you by experience, seeing approvals pop up every 5 seconds is intimidating.
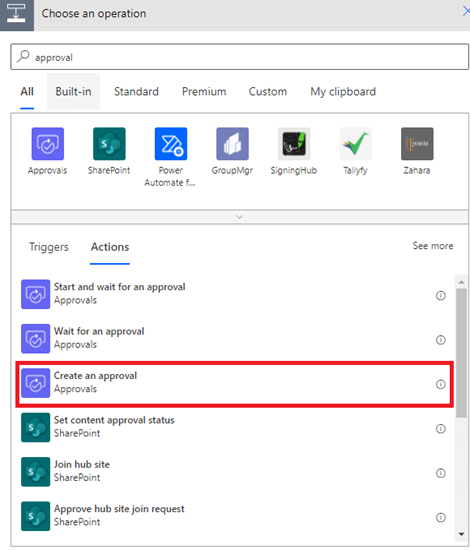
Now we need to create our approval. Click on “New Step” and search for "Approvals". You will select the “Create an approval” option.
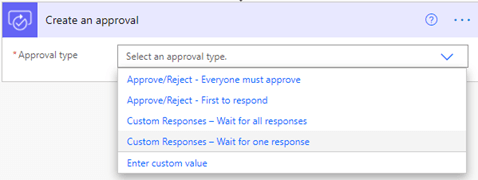
From here, we need to select the kind of approval we want. You have a few options:
- Approve/Reject – Everyone must approve.
- Approve/Reject – First to respond.
- Custom Responses – Wait for all responses.
- Custom Responses – Wait for one response.
You can use whatever best suites your needs for this flow. The ability to use custom responses will allow you to use this flow for the task management scenario discussed above.
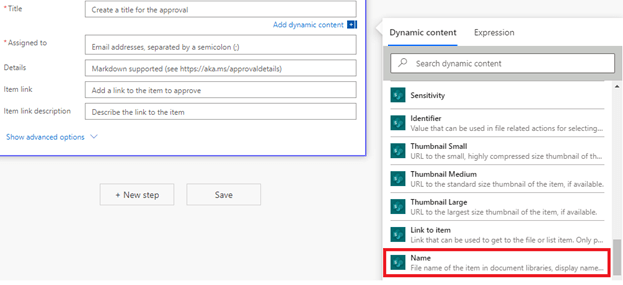
Once you have selected this, we simply need to put the title, who is approving the document, and a link to the item to approve. For our title, we are going to use some dynamic content, and select “Name”. This is going to pull the file name of the item from the document library.
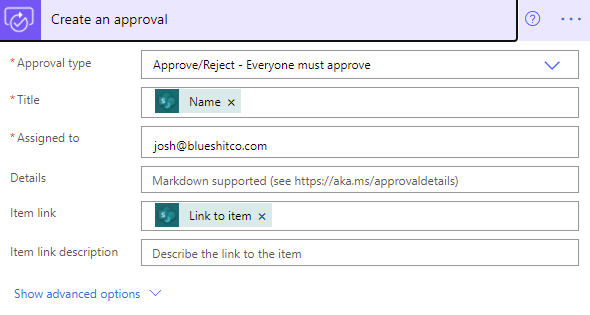
We will then pick who the approver is going to be.

The final thing we are going to do is add a link to the item. We want our approvers to be able to go in and see the documentation. Again, we are going to use our dynamic content and search for “Link to item”. This will create a link for our approver and add it to the approval.
Now, we click "Save", and test the flow to make sure it works!
Make the Approvals App Work For You
As you can see, there are many ways to leverage Approvals beyond a singular document approval. You can use it for change management if you are a Project Manager, as shown above, create a leave request app if you are in HR, and even more opportunities for different departments.
Leveraging out-of-the-box tools to achieve business goals is what we do at Bloom Software. If you have a business problem, feel free to contact us to see if there are any out-of-the-box solutions that we can help you come up with for your organization.