


Power Automate is an amazing tool that can be used to help automate numerous tedious tasks or anything that would require multiple steps. Some of the templates that are provided to you directly out of the box are:
- Saving Office 365 email attachments to OneDrive.
- Sending yourself a 10-minute reminder.
- Getting a push notification when you get an email from your boss.
These are just a few of the great Flows that have already been created for you and will allow you to spend less time doing the little time-wasters in your day. Today, we are going to look at creating our first Flow from scratch. The plan is to create a Flow that will block out a set amount of minutes in our calendar and give a subject line as to why.
Opening Power Automate
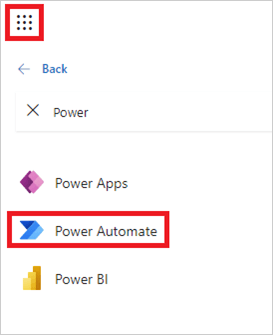
Opening Power Automate is super easy. Just click on the waffle menu, and find Power Automate (or navigate to flow.microsoft.com). If it is not in your apps list, simply click on All Apps, then search for Power Automate.
Starting Your First Power Automate Flow
Now, let’s get into the fun stuff, it’s time to start our first Flow! We begin by clicking on Create in our sidebar, and we can look at the types of Flows we can make.

The options that we are provided from blank are the following:
- Automated Flow: This will trigger when an event occurs. There is a large list of triggers that you can use.
- Instant Flow: This is a Flow that can be triggered manually, either through the Power Automate mobile app, or by clicking “Run” from the Flow details screen.
- Scheduled Flow: This is a flow that will trigger on a schedule and can be set to repeat.
- UI Flow: This is a flow that can be triggered on Windows and Web applications.
- Business Process Flow: This is a flow that is normally triggered with Dynamics 365 or model-driven Power Apps.
Today we are going to look at an Instant Flow that you can trigger whenever you want to book time out of your calendar.
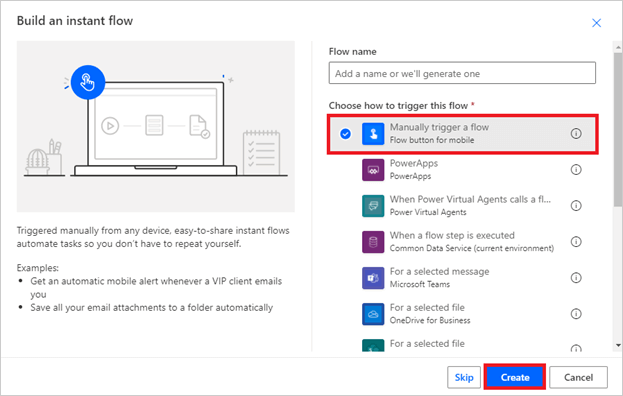
We start by selecting the Instant Flow, and we will get an option box pop up. In the option box, we will select (from a list) how we want to trigger this. First thing we will do is name our Flow. Make sure to use a simple naming convention to make it easy for you to find your Flows moving forward.
Next, we will simply select Manually trigger a flow. We will then hit Create to start our first ever Flow!
Setting Up Variables
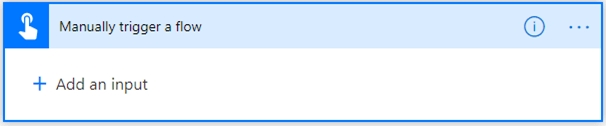
Now, we need to start entering the variables that can be changed when we start the Flow. We will do this by adding an input after the Flow has started. Click on your Manually trigger a flow, and you will get a drop-down that will allow you to Add an input.
Please note that the information that we collect from these fields will be called variables moving forward.
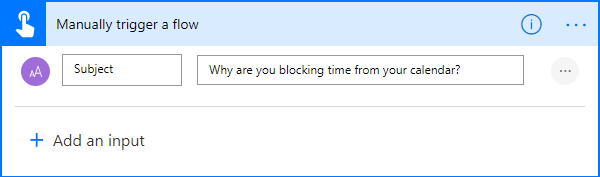
For the first one, we are going to want to add a subject as to why we are blocking out our calendar. For this, we will select text input. It will then give you two input boxes. The first one, which they call Title, will be what it is called when you have to recall it in future steps. Let’s start by calling that Subject.
The second box is the prompt that you will get when you run the Flow. You can normally leave it as default, but for the sake of practice, let's call it “Why are you blocking the time from your calendar?”
The next thing that we need to do is set up the variable of how long we will be blocking our calendars. We will be adding another input in, but this time it will be a numbers input, as we do not want to have letters associated to time.
We will add another input, and select numbers, then we will repeat as we did above, but this time, we are going to set our variable to Minutes, and we are going to ask the user how long they want to book and make sure that we tell them we want the time in minutes.

Choosing an Action
Congratulations! We have now finished the first part of our first Flow! Now, we need to take those inputs and make them do something!
We will click on the + New step button. This will give us a large list of connectors and actions that we can use with the variables we have created. We are looking to book time in your calendar, so we will start by searching for calendar, and this will provide us with every application that we can associate with. We will be using our Office 365 Outlook calendar for this.
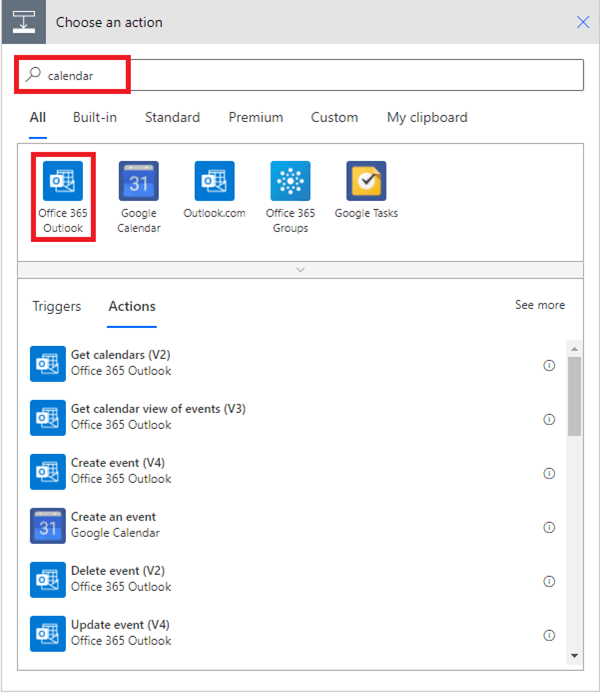
We know the variables, and we know what program we want to use; now, we just need to decide what our Flow is going to do. We have decided that we are booking time out of our calendar for “Subject” Reason, and “Minutes” length of time. This would mean that we want to create an event on our calendar. We will select the Create event action.

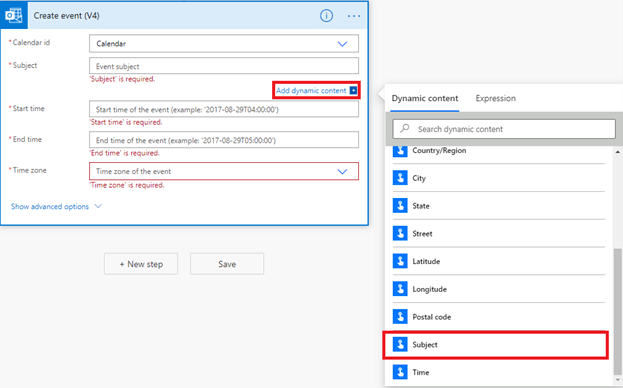
You will get a couple of options, as seen above, that you will need to fill out. So, we can start with the Calendar id. This is simply selecting which calendar you want to point your Flow. You will have the options of the calendars that are found in “My Calendars” in Outlook. We will select the simple Calendar option.
Now, this is where you are going to recall your first variable. We will click into the Subject line, and you should get a pop up for Dynamic Content. If not, simply click on the button underneath that states Add dynamic content. You will get a list of the dynamic content that you can use. These are all variables that can be used. We are going to recall the Subject variable, to use that information when we block out time.
We now have what calendar we want to block out, we have the reason as to why we are blocking it out, and now we will look at the start time of when to block it out. Time to feel like a software developer and create an Expression to start.
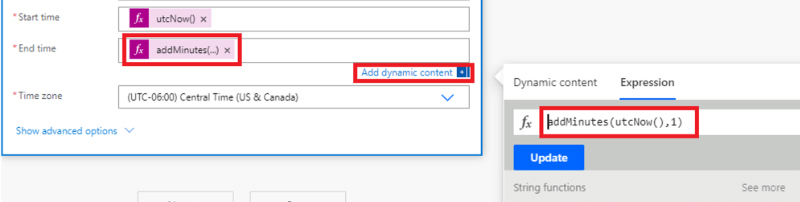
The way we can do that is by clicking Expression in your Dynamic Content menu for start time, and then adding the string below:
This will start the block out for the time that you start your flow. The UTC stands for Universal Time Coordinated, and you want it to begin now.

Time to assign a start time, but we need to take the Minutes variable from above and put that into our end time. So, like above, we will click into End time, then go back into expressions, but this time we are going to change it up.
In the expression, we are going to put the string below:
When we get here, we are going to go back to our dynamic content, and add the Minutes variable). What this is going to do is take the Minute variable that was created, and add it to the UTC, leaving us with the end time to block out.
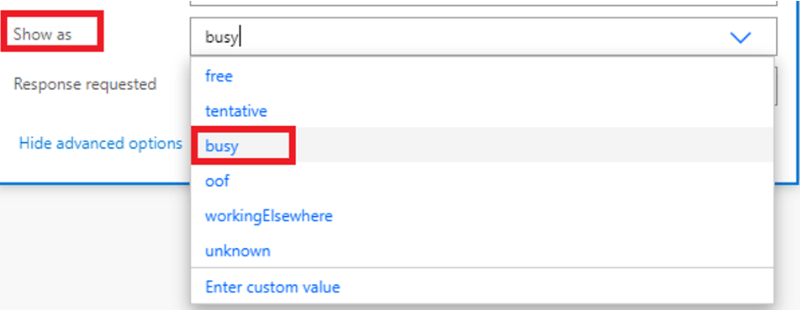
The final 2 steps are the easy parts. The next thing you will do is select the time zone that you are in. We then want to set our calendar to busy when we are blocking out our time.
To do this, we need to go into advanced options, then scroll down to Show as. From there, go into the dropdown, and select busy.
Testing Your Flow
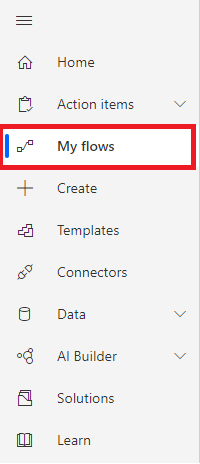
That’s the end of it! We have completed our first Flow! Now we just need to make sure that it works! Go to the bottom of your page and hit Save. Once we have saved our Flow, we will go to My Flows to find it.
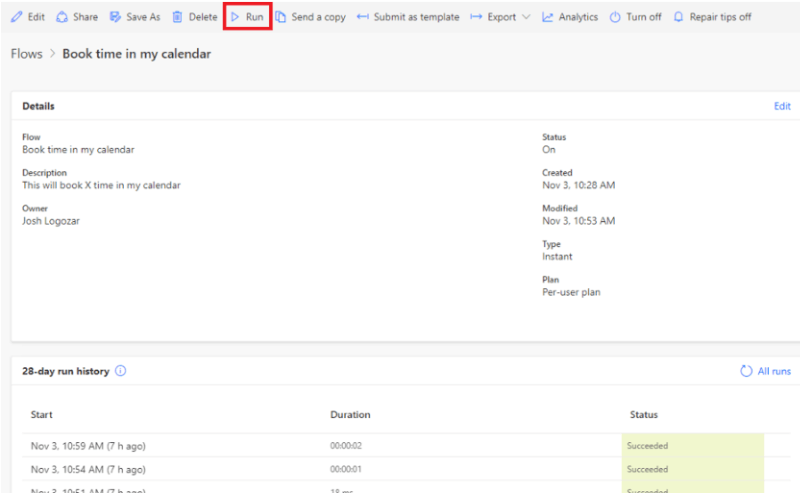
Now, for the moment of truth, and everything we have been waiting for. Let's run it and see if it books time in the calendar. Click Run in the top bar of the Flow.
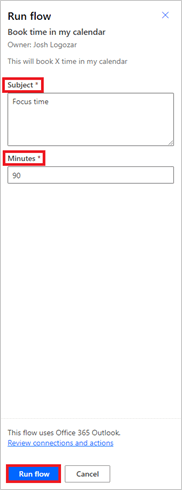
Next step is to fill out all the variables that we have put in. This will be your subject and the number of minutes. Once we have done that, simply click Run Flow, and we will see if everything worked!
Finally, we will go back to our Flow, and in the run history, you will see that it has succeeded. You should then verify your calendar to make sure that it is in there.
Now that you have learned how to create your first Power Automate Flow, take a look at the templates that Microsoft provides for you out of the box.
If you need any help with Power Automate, or want to learn more about what it can do, reach out to us here at Bloom Software.